本文介绍在 win10 中使用 VS Code 配置 ns3 远程开发环境 (代码补全、调试) 的步骤,包括 ns3 的安装以及 VS Code 的配置。
如果不想配置可以直接使用这个 Docker 镜像。
1 安装 ns3 及其依赖
首先,安装 ns3,如果已经安装过可以跳到下一步。
1.1 安装依赖
安装 ns3 前需要安装以下软件:
- g++ 7 及以上版本
- Python 3
- Git
- tar
- bunzip2
以 Ubuntu 为例,输入以下命令安装依赖:
1 | $ sudo apt install gcc g++ git |
注:一般情况下,Python 3、tar 和 bunzip2 在 Ubuntu 系统中是自带的,所以这里不用安装。
1.2 安装 ns3
以安装 3.34 版本的 ns3 为例,首先使用 cd 命令切换到你想要安装 ns3 的文件夹,然后使用以下命令下载 ns3:
1 | $ wget https://www.nsnam.org/release/ns-allinone-3.34.tar.bz2 |
下载完成后将其解压:
1 | $ tar xjf ns-allinone-3.34.tar.bz2 |
然后进行编译。
1 | $ cd ns-allinone-3.34 |
看到以下输出就是编译完成了
1 | Waf: Leaving directory '/path/to/workspace/ns-allinone-3.34/ns-3.34/build' |
2 配置 VS Code
2.1 安装插件
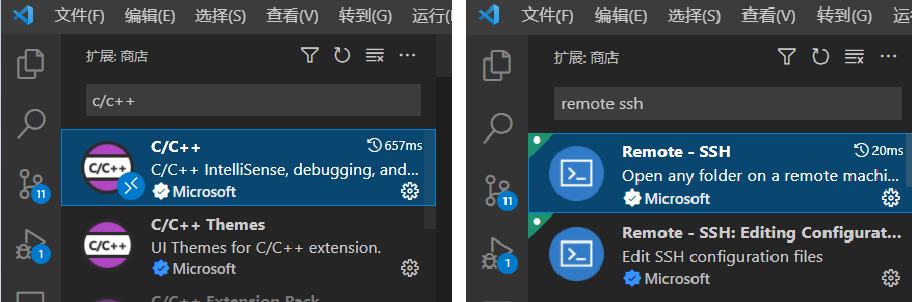
打开 VS Code 插件商店,安装 Remote - SSH 和 C/C++ 两个插件
注:如果你的 VS Code 搜索不到这个插件,说明你安装的是开源的 VS Codium,这个版本不支持部分插件,需要重新安装完整版。
2.2 配置远程
在 VS Code 中按 F1, 输入 Remote-SSH,选择 Remote-SSH: Connect to Host 选项,再选择 Add New SSH Host,输入 ssh username@hostname,这里将 username 换成你自己 Linux 系统中的用户名,hostname 换成自己 Linux 系统的 ip。

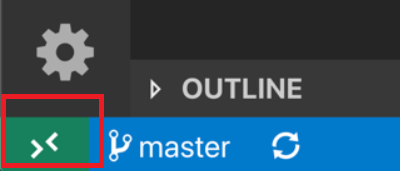
然后回车选择第一个文件保存。添加完成后,点击左下角的 “><” 符号
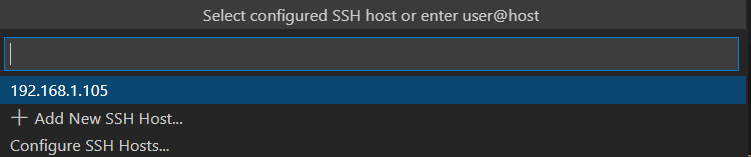
选择 Connect to host,再选择刚才添加的 Host。例如我刚才添加的是 192.168.1.105
这时,VS Code 会打开一个新的窗口,在弹出的窗口中选择 Linux

然后输入密码即可成功连接到远程服务器。
2.3 配置 ns3 代码提示
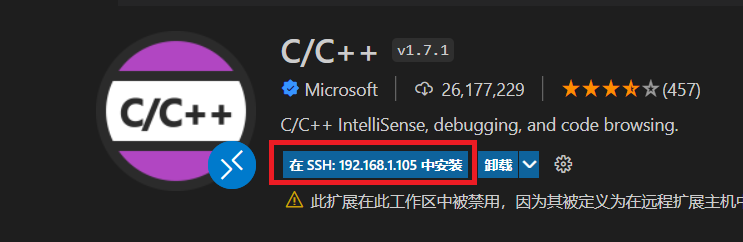
再次打开插件商店,搜索 C/C++ 插件,选择在 SSH 中安装
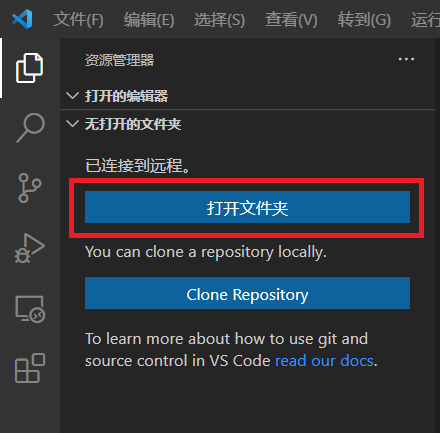
在 VS Code 左侧选择打开文件夹,打开 ns3 的安装文件夹。例如,我要打开 ns-3.34 文件夹。若弹出是否信任文件夹,选择信任。
在 VS Code 中按 F1, 打开 c/c++: Edit configurations(json),修改 c_cpp_properties.json 的配置为如下所示
1 | // 复制全部内容, 替换 c_cpp_properties.json 的全部内容即可 |
2.4 配置 ns3 代码编译
随便打开一个代码文件,点击菜单栏的终端,选择配置默认生成任务,选择 C/C++: cpp生成活动文件,(如果你的 VS Code 是英文版,选择 C/C++: cpp build active file)。修改 task.json 的配置为如下所示:
1 | // 复制全部内容, 替换 task.json 的全部内容即可 |
2.5 配置 ns3 代码调试
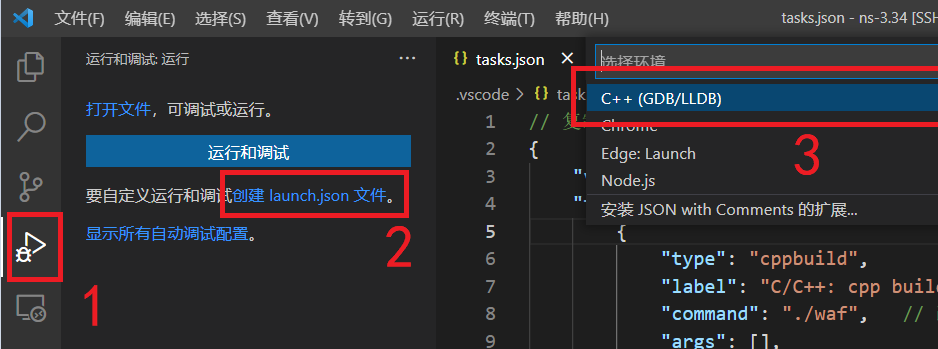
点击左侧的调试图标,点击创建 lauch.json 文件,选择 C++ (GDB/LLDB).
修改 launch.json 的配置为如下所示:
1 | // 复制全部内容, 替换 launch.json 的全部内容即可 |
最后,在 Linux 中输入以下语句修改环境变量:
1 | $ vim ~/.bashrc |
在文件末尾添加以下语句,并将 "/path/to/ns-3.34/build/lib" 改为你自己 ns3 中 lib 文件夹对应的绝对路径。
1 | export LD_LIBRARY_PATH="/path/to/ns-3.34/build/lib" |
保存并退出后,输入以下语句更新环境变量:
1 | $ source ~/.bashrc |
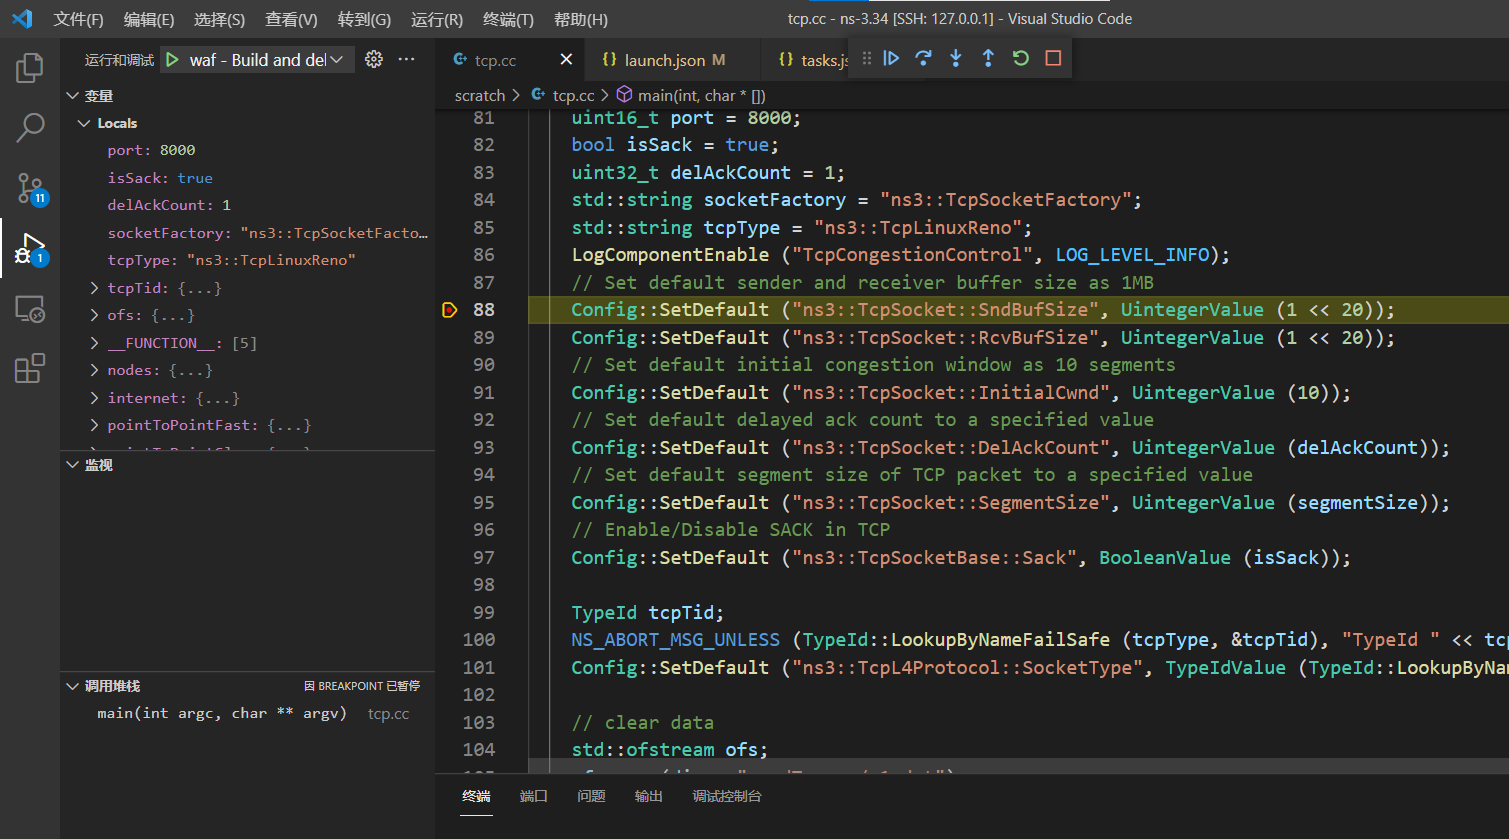
最后,在你的函数中添加一个断点,按 F5 运行,可以在左侧看到当前的变量、调用堆栈等信息,调试成功。